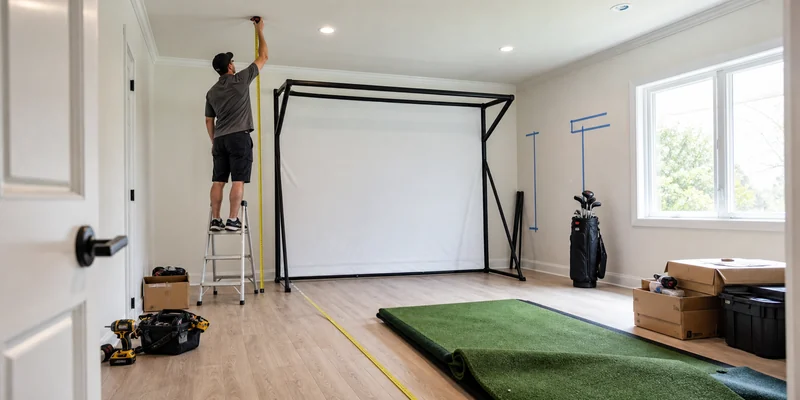
Last updated: August 10, 2026
Every failed home simulator project dies on the same spreadsheet row: golf simulator room dimensions that were guessed instead of measured. The gear is returnable; the ceiling is not. What makes room planning tricky is that no single magic number exists, because the real requirement is your swing, your longest club, and your specific launch monitor, all standing in the actual room.
What does exist is a reliable method. This guide gives you the dimensions that matter in order of importance, the widely used rules of thumb, and, more useful than either, the physical tests that settle any doubt in ten minutes with a tape measure and a driver. Run the tests before spending anything and the rest of the build becomes shopping instead of gambling.
Quick Answer
What room dimensions does a golf simulator need?
- Ceiling height rules first: most golfers need roughly 9 to 10 ft for a full driver swing, measured under the lowest duct, beam, or fixture at the hitting spot.
- Width must clear your full swing arc with a comfortable margin on both sides, more if both right- and left-handed players will use the room.
- Depth is set by your equipment: the screen’s listed clearance behind it, the hitting position, and your launch monitor’s listed placement distances, which differ sharply between radar and camera units.
The Dimensions That Matter, In Order
Save this table; it is the whole planning conversation. Work top to bottom, because a failure higher up cannot be fixed lower down.
| Dimension | What it must clear | How to test it |
|---|---|---|
| Ceiling height | Your tallest swing arc; roughly 9 to 10 ft suits most golfers with a driver | Slow, then full-tempo practice swings with your driver at the exact hitting spot, under the lowest obstruction, watching the clubhead’s highest point |
| Width | The full swing arc plus margin on both sides, and side room for the screen or net frame | Swing at the planned ball position and check clearance to walls and posts on both sides; repeat for a lefty if one will play |
| Depth | Screen clearance at one end, hitting position in the middle, monitor placement behind or beside | Add the listed numbers from your screen and launch monitor documentation to your hitting stance, then walk the line with tape marks |
| Obstructions | Ducts, beams, lights, garage door tracks, fans | Measure under each one near the swing zone; the lowest object near the arc is your true ceiling |
| Buffer zones | Space behind the player for safety and spectators | Nobody should be able to stand beside the swing; seating and walkways belong fully behind the hitting line |
Ceiling Height: The Gate Everything Else Waits Behind
Height fails more rooms than width and depth combined, which is why it gets tested first. The roughly 9 to 10 ft rule of thumb exists because a driver swung on a full arc by a player of average height peaks surprisingly high, but the rule is a starting point, not a verdict: shorter players, flatter swings, and shorter clubs all clear lower ceilings, and taller players with steep swings may want more than the rule suggests.
The test beats the rule every time. Take your driver to the exact hitting spot, start with deliberately slow swings, and build to full tempo while someone watches the clearance to the lowest object, not the open ceiling. If the driver fails but irons pass, you still have a viable room: plenty of golfers run deliberate iron-and-wedge setups, a strategy covered honestly in our basement simulator guide, where this exact situation lives.
Width and Depth: Where the Equipment Writes the Rules
Width is a comfort and safety dimension: the swing arc needs clear air on both sides of the player, the screen or net needs its frame width, and a room used by both right- and left-handed golfers needs a centered hitting position rather than an offset one, which effectively demands more width. Test it physically the same way as height, with slow swings at the true ball position and eyes on both walls.
Depth is where equipment documentation replaces rules of thumb entirely. Three listed numbers add up: the clearance your impact screen requires behind it to absorb shots, the distance from screen to hitting position recommended by the screen or enclosure maker, and your launch monitor’s placement requirement. That last one is the big variable: radar units sit several feet behind the ball and want flight space in front, while camera-based units sit close to the hitting zone, which is why tight rooms so often end up with camera tracking. Check the listed space requirements for your specific unit before finalizing any floor plan.
Reading Your Room: Garage, Basement, Shed
Each candidate room fails in its own characteristic way, so aim the flashlight where failures live. Garages usually pass on height but hide obstructions: door tracks, opener motors, and springs hang exactly where drivers swing, and the layouts that dodge them are mapped in the garage simulator guide. Basements offer depth and privacy but carry the lowest ceilings and the most ductwork. Backyard sheds are bought or built to fit, which makes them the one room where you control the dimensions; the planning order is in the simulator shed guide.
Whichever room wins, mark the full layout in painter’s tape before buying: screen line, hitting spot, monitor position, and the no-walk zone behind the player. Living with the tape for a week costs nothing and surfaces every practical annoyance, from door swings to light switches, while they are still free to fix.
Common Mistakes to Avoid
- Measuring the open ceiling and forgetting the lowest duct. The swing happens under whatever hangs lowest near the arc. That object sets your true ceiling.
- Testing with a cautious half swing. Adrenaline and tempo return the moment play feels real. Build to genuine full swings during the test or the test lies.
- Planning depth without the monitor’s documentation. Radar and camera units have opposite placement needs. The listed distances for your specific unit are the plan.
- Forgetting the second golfer. A room sized for one right-hander is often wrong for a lefty guest or a growing junior. Centered layouts cost width but buy flexibility.
- Skipping the buffer behind the player. Spectators, doorways, and foot traffic belong fully behind the hitting line. Design the safe zone in, not around.
From Measurements to a Build
Once the room passes its tests, the fun half begins. The staged build order, and how to keep early purchases compatible with later upgrades, is walked through in the DIY simulator guide, and the finished-room inspiration side lives in simulator room ideas. For matching complete setups to your verified space and budget, our guide to the best golf simulator for home organizes the market by exactly the constraints you just measured.
Frequently Asked Questions
What ceiling height do I need for a golf simulator? Roughly 9 to 10 ft works for most golfers swinging a driver, but the deciding test is your own full swing under the lowest obstruction at the hitting spot.
Can I run a simulator with a lower ceiling? Often yes, by building around irons and wedges, which swing on shorter arcs. Many basement setups are designed this way on purpose.
How much depth does a simulator room need? The sum of three listed numbers: screen clearance behind, screen-to-hitting distance, and your launch monitor’s placement requirement. Radar units need meaningfully more depth than camera units, so check your unit’s documentation.
Does room width matter if I play alone? Yes: the swing arc needs clear air on both sides, and the screen frame needs its width. Solo right-handed rooms can offset the hitting position, but centered layouts stay friendlier for guests.
Which room is best: garage, basement, or shed? The one that passes the height test with your driver. Garages usually win on height, basements on climate and privacy, sheds on control, and each has a dedicated guide on this site.
The Bottom Line
Golf simulator room dimensions come down to a hierarchy: ceiling first at roughly 9 to 10 ft for most golfers, width for the full arc with margin, and depth dictated by the listed requirements of your screen and launch monitor. Trust physical tests over rules of thumb, tape the layout before buying, and the room will never be the thing that fails the build.