Last updated: August 10, 2026
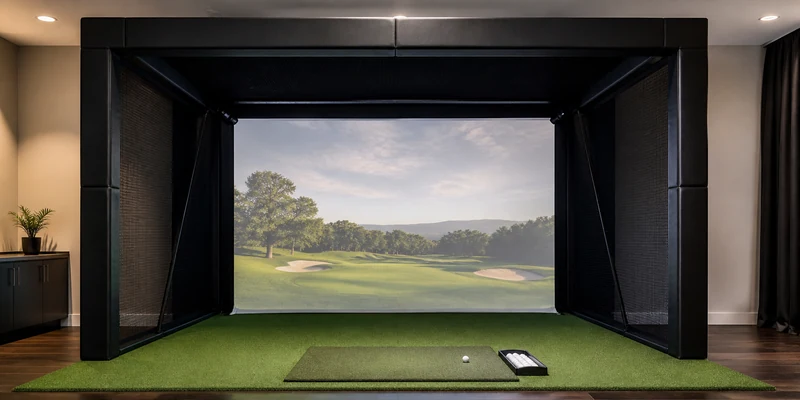
Choosing the best golf simulator enclosure is the moment a simulator project stops being a pile of parts and starts looking like a real golf studio. The enclosure is the frame, screen, and side walls that turn one end of a garage or basement into a hitting bay: it catches the shot, displays the projected image, and keeps stray balls from redecorating your drywall.
This guide walks through the decisions that matter most: full enclosure kit versus screen-only setups, sizing the frame to your room, screen material quality, and how much containment the side barriers really give you. Along the way it points to the kits that come up most often in owner feedback, from complete packages to budget frames you can upgrade later.
This article contains affiliate links. If you buy through them, we may earn a commission at no extra cost to you. Learn more.
Quick Answer
Which golf simulator enclosure should you buy?
- For most home setups, a complete enclosure kit around 10 by 8 feet with a multi-layer impact screen and enclosed sides is the sweet spot: one purchase, matched parts, and a clean projected image.
- Measure first, then shop. Check the listed space requirements for any kit; most golfers need roughly 9 to 10 foot ceilings plus room to swing freely on both sides.
- Screen quality is where kits differ most. Look for a tightly woven, multi-layer impact screen with reinforced edges, and always leave buffer space behind it.
What to Check Before You Buy
Every row below is something you can verify from a product listing before you commit. Get these right and the difference between kits becomes mostly a matter of finish and budget.
| What to check | Why it matters | What to look for |
|---|---|---|
| Frame footprint | The enclosure has to fit with swing room to spare | Compare listed width, height, and depth against your room, then add free space on both sides of the hitting area |
| Screen material | Determines image quality, noise, and durability | Multi-layer woven polyester with reinforced, padded edges; avoid thin single-layer sheets for real golf balls |
| Side containment | Mishits rarely fly straight | Enclosed side walls or side barrier netting that extends toward the hitting area |
| Buffer space | Screens need room to flex on impact | Mounting that keeps the screen away from the wall behind it; a foot or more of clearance is a common recommendation |
| Light control | A projected image competes with ambient light | Dark, non-reflective enclosure walls and a top valance that shields the screen |
| Assembly and hardware | Kits vary from an afternoon to a weekend project | Labeled poles, ball-bungee screen attachment, and included wall or floor anchoring options |
If the screen itself is the part you want to research deeper, our golf impact screen guide covers materials and mounting in detail. And if you are still sketching the room, start with golf simulator room dimensions before any frame goes on order.
Full Enclosure Kit or Screen Only?
A full enclosure kit bundles the frame, impact screen, side walls, and usually a top valance in one matched package. The parts fit each other by design, the screen arrives sized to the frame, and the enclosed sides double as light control for the projector. For most golfers building a first simulator bay, the kit route saves a long chain of measuring and compatibility questions.
Screen-only setups hang an impact screen from a ceiling mount or a simple frame and skip the side walls. They cost less and pack away more easily, but they contain less, show more ambient light around the image, and leave your walls exposed to the occasional wild mishit. They make sense in multi-use rooms where the simulator has to disappear between sessions, a situation where a retractable screen is worth a look too.
Sizing: Match the Enclosure to the Room, Not the Other Way Around
Enclosures are commonly listed in width by height footprints such as 10 by 8 feet, with depth added by the side walls. The right size is the biggest screen your room can hold while still leaving comfortable swing space and the buffer behind the screen. Check the listed space requirements for any kit you consider; most golfers need roughly 9 to 10 foot ceilings for a full swing with a driver, and taller golfers should test their swing height before ordering anything.
Aspect ratio matters for the projected image as well. Many enclosures are squarer than a widescreen TV, closer to 4:3 than 16:9, which affects which projector settings you will use. Our golf simulator projector guide explains how throw ratio and aspect handling interact with enclosure sizes.
Our Top Enclosure Picks
How we chose: we compared widely available enclosure kits on screen construction, frame stability, side containment, and how consistently owners report clean assembly and durable screens over time. Selections lean on manufacturer specifications and recurring themes in customer reviews rather than any hands-on trial of our own.
One reassurance before the list: every pick here uses a multi-layer impact screen intended for real golf balls, because a bargain frame around a screen that dimples and sags is no bargain at all.
🏆 Best Overall
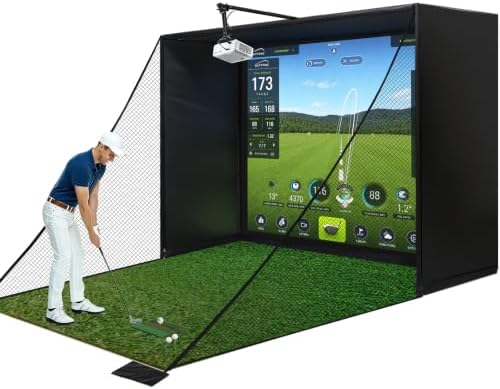
A complete enclosure package around 10 by 8 feet with a multi-layer impact screen, enclosed dark side walls, and a top valance. Owners consistently mention the step up in image quality once the sides block ambient light.
💛 Best Value
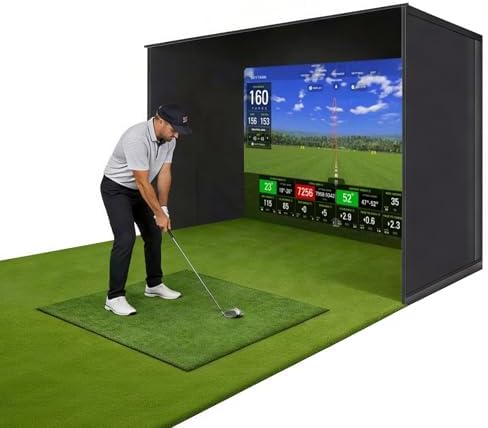
A budget-friendly enclosure kit with a sturdy pole frame and included impact screen that covers the essentials without the premium finish. Reviews mention it as a common first build that holds up to regular sessions.
⭐ Upgrade Pick
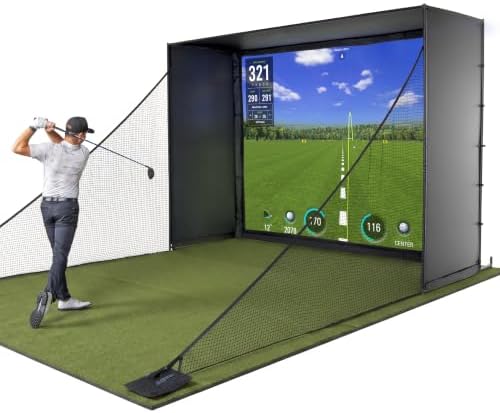
A heavier-duty enclosure from a brand known for practice gear, with a taut screen surface for a crisp projected image and more robust framing for daily use. A logical choice if the simulator room is a permanent fixture.
Picks by Situation: Small Rooms and Upgraders
Not every build starts with a full kit. These two cover the most common alternate routes: a compact footprint for tight rooms, and a screen-first upgrade path for golfers who already own a frame or plan to build one.
📐 Best for Smaller Rooms
A compact enclosure sized below the standard 10 foot width, useful for single-garage bays and basements where every inch of swing room counts. Confirm the listed height against your ceiling before ordering.

🖥️ Best Screen-First Upgrade
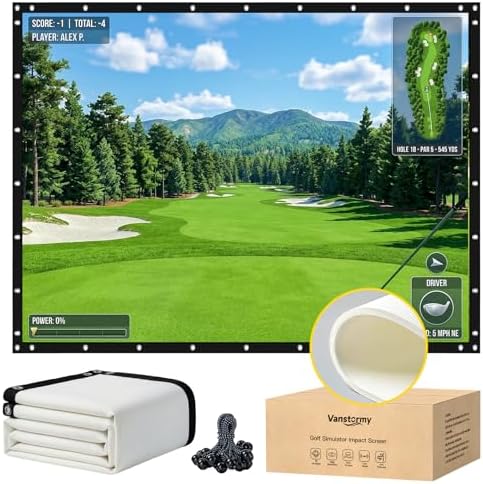
A standalone multi-layer impact screen with grommeted or reinforced edges that can hang in an existing frame or DIY build, the natural pairing for the frame plans in our DIY guide.
Setup, Placement, and Living With It
Placement decides how good the finished bay feels. Center the hitting area on the screen, keep the enclosure square to the room, and leave clearance behind the screen so it can absorb impact without slapping the wall. Anchor the frame the way the manufacturer intends; an enclosure that shifts a little with every shot loosens itself over weeks. Plan the projector position early, since the enclosure’s top valance and side walls limit where a floor or ceiling mount can go.
Living with an enclosure is mostly about the screen. Let it hang with even tension, brush off ball marks periodically, and rotate your hitting spot on the mat so wear spreads across the screen face rather than drilling one bright spot in the middle. If you are planning the room around it, our guide to simulator lighting and wall padding covers the finishing layer most first builds skip.
Common Mistakes to Avoid
- Buying the enclosure before measuring the swing. Take practice swings with your longest club where the bay will go. Ceiling height sells more enclosures back to the secondhand market than any other mistake.
- Mounting the screen tight against a wall. Impact screens need buffer space to flex. Without it, shots are louder, bounce-back is harsher, and both wall and screen wear faster.
- Assuming full containment. No enclosure catches every conceivable mishit. Side walls and netting reduce risk; sensible spacing from windows and people does the rest.
- Ignoring the projector plan. An enclosure bought without a throw-distance check often ends up with the projector in the swing path. Sort screen and projector as one decision.
- Skipping the anchoring step. An unanchored frame walks backward over time. Use the included stakes, plates, or wall fixings from day one.
Where to Go From Here
The enclosure is one of three big hardware choices in a simulator build. The screen deserves its own research in our impact screen guide, and the projector question is covered in the simulator projector roundup. Handy builders can save real money with our DIY enclosure walkthrough. And if you are still assembling the full picture, launch monitor included, the best golf simulator for home guide ties the whole package together.
Frequently Asked Questions
What size golf simulator enclosure do I need? The most common home size is around 10 feet wide by 8 feet tall, but the honest answer is the biggest screen your room fits with free swing space and ceiling clearance. Check listed space requirements and our room dimensions guide before ordering.
Can I use real golf balls with an enclosure? With a quality multi-layer impact screen, correct tension, and buffer space behind the screen, enclosures are designed for real balls. Thin single-layer screens and casual practice nets are not, so always match the ball to what the screen is rated for.
Do I need the side walls? They are optional but valuable. Enclosed sides contain mishits, block ambient light for a better projected image, and make the bay feel finished. Screen-only setups work, they just give some of that back.
How far should the screen be from the wall behind it? Leave enough clearance for the screen to flex on impact without touching anything; a foot or more is a common recommendation, and more is better if the room allows it.
Are enclosure kits hard to assemble? Most pole-and-fitting kits go up in an afternoon with two people. The screen attachment with ball bungees takes patience to tension evenly, and even tension is what keeps the image flat.
The Bottom Line
The best golf simulator enclosure for most homes is a complete kit around 10 by 8 feet with a multi-layer impact screen, enclosed sides, and honest space requirements you have checked against your own room. Buy the screen quality first, the frame second, and the finish last. Measure twice, and the enclosure becomes the easiest part of the build.