Last updated: August 10, 2026
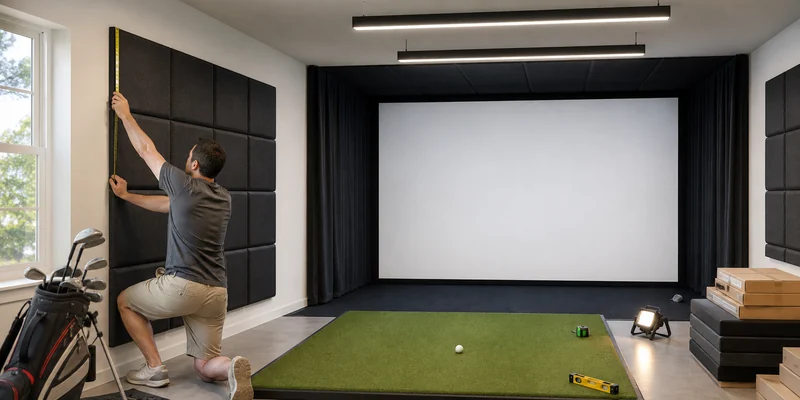
Good golf simulator lighting and wall padding are the finishing details that most first builds skip and most second builds start with. Lighting decides whether your launch monitor’s camera sees the ball, whether the projected image pops or fades, and whether the bay feels like a studio or a storage room. Padding decides what happens on the day a shot finds the wall instead of the screen.
This guide covers both layers of finish: how to light a bay so the equipment and the golfer both see well, and where padding earns its place around the hitting area. It also points to the product types that builders actually use, since this corner of the market is more generic hardware than big golf brands.
This article contains affiliate links. If you buy through them, we may earn a commission at no extra cost to you. Learn more.
Quick Answer
How should you light and pad a golf simulator room?
- Light the golfer and the hitting zone, not the screen: place fixtures between the hitting area and the screen, aimed down and slightly back, so the projected image stays dark and punchy.
- Choose dimmable, even LED lighting; camera-based launch monitors like consistent light on the ball, and flicker-free fixtures avoid odd artifacts.
- Pad the surfaces a mishit can realistically reach: the wall sections beside and behind the screen, columns in the swing zone, and low ceilings.
The Setup at a Glance
Think of the bay as three zones with different lighting and protection needs. Getting each zone right is the whole game.
| Zone | Lighting goal | Padding goal |
|---|---|---|
| Screen end | As dark as possible; no fixture aimed at or near the screen face | Padding or barrier netting on walls beside and behind the enclosure for shots that miss the screen |
| Hitting zone | Bright, even, flicker-free light on the ball and golfer, from above and slightly behind the ball | Column and low-ceiling padding where a club or ricochet could make contact |
| Back of room | Comfortable ambient light for seating and screens, dimmable for play | Usually none needed; keep breakables and glass out of the ricochet zone instead |
Lighting interacts directly with your projector choice: a brighter projector forgives more ambient light, a dim one demands discipline. That trade-off is covered in the simulator projector guide.
Lighting a Bay: The Rules That Matter
The first rule is direction. Any light that reaches the screen face washes out the projected image, so fixtures belong between the golfer and the screen, aimed downward at the hitting zone and angled slightly away from the enclosure. Enclosure side walls and a top valance help by shading the screen from room light. Recessed or flush fixtures beat hanging ones in a room where clubs and balls travel.
The second rule is quality of light. Camera-based launch monitors generally prefer bright, consistent, flicker-free illumination on the ball, and budget LED fixtures with visible flicker can interact badly with high-speed cameras. Dimmable LED panels or shop lights with good diffusion give you a bright setting for measurement and practice, and a lower scene for casual play. Radar-based monitors are less fussy about light, one of the practical differences explained in our simulator accuracy guide. If you notice your monitor misreading in a dim bay, try more light on the ball before blaming the hardware.
Padding: Where It Earns Its Place
Padding is not about wrapping the room in foam. It is about the short list of surfaces a mishit or a ricochet can realistically reach: the wall strips immediately left and right of the enclosure, the wall behind a screen mounted close to it, support columns inside the swing radius, and ceilings below roughly full swing height. Gym-style wall pads and foam panels handle flat surfaces; column wraps handle posts.
Beyond protection, soft surfaces quiet the bay noticeably. A concrete garage reflects every impact sound; foam panels and padded walls absorb some of it, which households above or beside the sim room appreciate. The floor contributes too, which is one more argument for the turf-over-underlay approach in our turf and flooring guide.
Our Lighting and Padding Picks
How we chose: we looked for the product types that appear again and again in finished bays, favoring dimmable, flicker-free lighting and dense, mountable padding, based on manufacturer specifications and recurring themes in owner feedback rather than any hands-on trial of our own.
This category is mostly generic hardware, so match sizes and quantities to your own room.
🏆 Best Overall Lighting
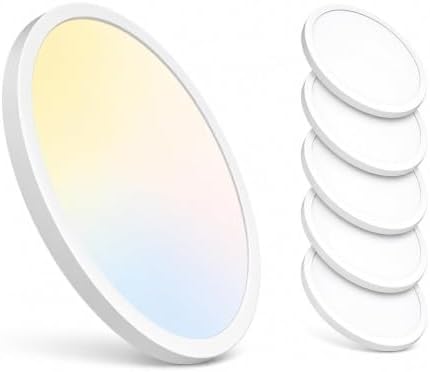
Dimmable flush-mount LED ceiling panels with even diffusion, the standard choice for lighting the hitting zone brightly without glare or dangling hardware in the swing path.
💛 Best Value Lighting
Linkable LED shop lights that flood a garage bay with bright, even light for little money; choose a flicker-free model and mount them behind the hitting zone, never over the screen.

🛡️ Best Wall Padding
Gym-style foam wall pads that mount beside and behind the enclosure, the same product type sports facilities use for impact zones.

One More Finishing Touch
For bays chasing atmosphere as well as function, one addition shows up in nearly every showcase build.
✨ Best Ambiance Upgrade
Dimmable LED strip lighting along the enclosure frame or ceiling perimeter, giving the bay a finished studio glow during play without throwing light onto the screen face.

Installation Tips That Save Regret
Wire and mount lighting before flooring and enclosure assembly if you can; every electrician’s job is easier in an empty room. Put the play lighting on a dimmer or smart switch from day one, because the right level for measuring ball flight and the right level for a relaxed evening round are not the same setting. Test your launch monitor under the final lighting before declaring the project done, and adjust angles rather than buying more fixtures if readings are inconsistent.
For padding, mount panels with the fasteners the manufacturer specifies rather than adhesive alone, since impact loosens glue over time. Cover the wall strip beside the enclosure at ball height first; it is the highest-traffic surprise zone. And leave the padding slightly proud of trim and outlets so the foam, not the hard edge, meets whatever arrives.
Common Mistakes to Avoid
- Aiming any fixture at the screen. The projected image loses contrast with every lumen that lands on it. Light the golfer, shade the screen.
- Buying flickery budget LEDs. Invisible to your eye, potentially visible to a high-speed camera. Flicker-free is a spec worth reading for.
- Hanging fixtures in the swing or ball path. Pendant lights and golf clubs share a room badly. Flush or recessed only.
- Padding nothing because the screen catches everything. Screens catch what reaches them. The wall beside the enclosure meets more mishits than most builders expect.
- Finishing the room before testing the monitor. Lighting problems are cheap to fix before the floor is down and expensive after. Test early, under real conditions.
Where to Go From Here
Lighting and padding are the last layer over decisions made earlier: the enclosure guide and projector guide cover the components your lighting has to serve, and simulator room ideas collects the design thinking for the whole space. Building from scratch? The complete component map lives at best golf simulator for home.
Frequently Asked Questions
What lighting is best for a golf simulator? Bright, even, dimmable LED lighting mounted between the hitting area and the screen, aimed at the golfer and ball rather than the screen face. Flush-mount panels and quality shop lights are the usual choices.
Does lighting affect launch monitor accuracy? It can, for camera-based units, which generally prefer consistent, flicker-free light on the ball. Radar-based units are less sensitive. If readings wobble in a dim room, add light to the hitting zone first.
Do I really need wall padding in a simulator room? Need is strong; want is accurate. The wall strips beside the enclosure take occasional hits in most bays, and foam panels are inexpensive insurance that also quiets the room.
Should simulator lights be on a dimmer? Yes. Full brightness suits measurement and practice; lower levels suit evening play and make the projected image look its best. One dimmer covers both moods.
How dark should the room be for the projector? The screen end should be as dark as you can make it, while the hitting zone stays lit. Enclosure side walls and a valance let both exist in one room.
The Bottom Line
Light the golfer, shade the screen, and pad the surfaces a bad shot can actually reach. Dimmable flicker-free LEDs between the hitting zone and the enclosure cover the lighting job, and gym-style foam handles the walls. These are the cheapest upgrades in the bay relative to how much more finished the room feels afterward.